
Collections - Defined
This section of the manual explains what a user can do with a collection. For instructions on
how to create a collection in Morphbank go to
Add Images to a Collection
A collection is a group of any objects in the Morphbank database assembled by members for the purpose of viewing and/or manipulating (e.g. rearranging the order, editing, and/or annotating, etc.) and storing the collected objects for future use.
Collections:
- must have at least one image/object. Deleting the last image will leave an empty collection. Do not delete it.
- have an order based on the owner's criteria. The initial order will correspond to the order the objects were initially selected.
- are identified by a unique internal id.
- are published (viewable to the world) when released by the creator (default 6 months if not otherwise notified).
Guidelines for working with collections:
A User may have multiple collections that will be identified by a name on the screen. Since the collection will have a unique internal identifier, the name may be duplicated but is not recommended.Unpublished owned collections:
- A user may alter the makeup of their own unpublished collection by adding or deleting images or other objects.
- An image or other Morphbank object can be added to a user's unpublished established collection.
- A user may delete one or more images/objects (or an entire collection) from an unpublished, owned collection.
- A user may change the order of the images/objects in their own unpublished collections.
- A collection owner may move an image/object from one unpublished collection to another owned, unpublished collection.
- An owner of an unpublished collection may annotate that collection.
Unpublished collections owned by other users:
A user may...
- browse and view unpublished collections of other users within groups to which he/she belongs.
- make a copy of an unpublished collection of another user provided they belong to the same group.
- copy an image from any collection to another unpublished, owned collection
- annotate an unpublished collection owned by another member in the group.
Published collections:
- A user may make a copy of any published collection. (This copy then becomes an unpublished collection owned by the user and group who created it.)
- A published collection cannot be edited by anyone but may be annotated.
The user's group/user's collection relationship:
- The user's collection will be shared with a group in Morphbank. The user must declare which group they belong to before they create the collection and that collection is shared with the declared group.
- The collection will be immediately viewable to all users in that group. (The collection cannot be accessed by the world until it is published).
- Although the owner may alter their own collection, other members of the group may not (but they may annotate it)
- Other members of the group may make a copy of another user's collection and thus create their own personal copy.
Managing collections:
The Collection Manager has been replaced with the Collections tab in the new My Manager interface of Morphbank. The Collections tab offers the user a list of all public collections and any they've created (public or private). The user can view other collections there and in addition, modify any of their own collections.
There is no limit on the number of collections a user may have.
New collections are created or copied through any of the My Manager tabs, Browse pages, Browse - Collections or through the results of a Search. Access all collections owned by other users in Morphbank thru the My Manager - Collections tab or Browse - Collections screen. The Collections tab of the My Manager interface allows users to keep track of their personal collections and is directly accessed from the Header Menu > Tools > My Manager.
Sample Collection
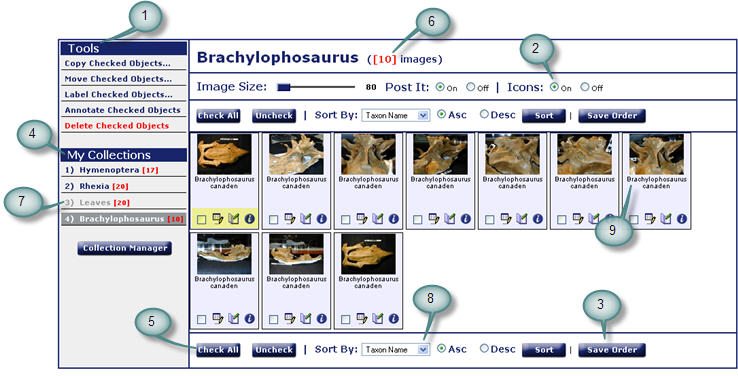
Tag descriptions
- Tools:
 To use Tools, images in the collection need to be
tagged by using the check box in the lower left hand
corner of each image as shown.
When the image is selected, its screen is highlighted so selected images are visible
at a glance.
To use Tools, images in the collection need to be
tagged by using the check box in the lower left hand
corner of each image as shown.
When the image is selected, its screen is highlighted so selected images are visible
at a glance.- Copy or move checked objects: Users have the option of copying or moving objects to a new collection or to another owned, unpublished collection. Check the images to include, then select the desired option from the dropdown list.
- Label checked objects: Users have the option of labeling the checked images by taxon name, specimen id, specimen part or view angle. Select the desired label criteria from the dropdown list.
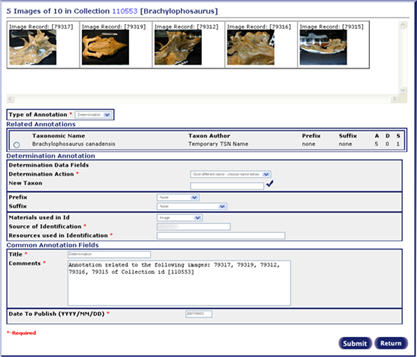
- Annotate checked objects: Users can annotate an image (single annotation) or an entire collection of images at one time (mass annotation). Complete instructions for this process can be found in Add Annotations located in the Annotations chapter of this manual.
- Delete checked objects: Users can permanently delete any of the checked images from an unpublished collection by selecting this option (checking all of the images in the collection deletes the entire collection). A confirmation message will appear prior to completing the delete.
- Collection display settings:
- Collection images display size: The default, most manageable image size is small due to load speed and space requirements. Use the slider bar to increase the image display size (May take longer to load). The aspect ratio is retained for all choices.
- Post It: Hovering over an image in a collection will display a post it note containing additional information. This feature can be turned off by selecting the appropriate radio button.
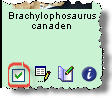
- Icons: Each image in a collection contains a row of icons (selection box,
edit, annotate, information) that may be turned on or off as needed.

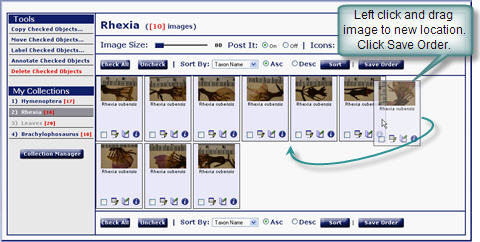
- Save the order:
The order of the images in the collection can be changed manually. Drag
and drop the image(s) into the new location. Retaining the
new order requires selecting the Save Order button. If this is not done,
the order will revert back to the previous state when exiting out of the
collection.
- Collection list: Offers the user a list of all the collections that have been created under the current username and group. The current collection that is being displayed is highlighted dark grey. The collections which are light grey are published collections. The red number in brackets corresponds to the number of images in the collection. Clicking on a collection will display the collection contents and saved order. To access other collections under the same username but created under another authorized group, return to the Select Group screen and login under that group. There is no limit on the number of collections a user may have.
- Check buttons: These buttons are used to check or uncheck an entire collection of images.
- Number of images: This number reflects the current number of images in the collection.
- Published collection: Published collections show up as grayed items on the collection list. They can be viewed, copied to another collection or annotated but not altered in any other way.
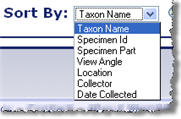 Sort:
The sort option enables the user to
organize their collection in a more
desirable order. Select the sort criteria
from the dropdown box and click on the
sort button. This will save your
collection in the sorted order.
Sort:
The sort option enables the user to
organize their collection in a more
desirable order. Select the sort criteria
from the dropdown box and click on the
sort button. This will save your
collection in the sorted order.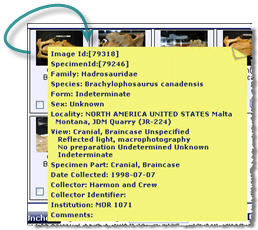 Images:
The image tiles contain the image and
options for annotating the image,
editing the title of the image or
displaying the single show feature
for the image. In addition, clicking on
the image will bring up the FSI Viewer
and hovering the mouse pointer over
the image tile will display an
informative Post it note pertaining to
that image.
Images:
The image tiles contain the image and
options for annotating the image,
editing the title of the image or
displaying the single show feature
for the image. In addition, clicking on
the image will bring up the FSI Viewer
and hovering the mouse pointer over
the image tile will display an
informative Post it note pertaining to
that image.
Next |
Contents
|